
Introduction
This article will focus on Inno Setup – a convenient tool intended to package applications for Windows OS.
Why Inno Setup? “Inno Setup today rivals and even surpasses many commercial installers in feature set and stability,” the developer’s official website says. Indeed, this tool is quite simple to learn and powerful in terms of its capabilities.
At the moment Inno Setup, developers mention the following features as key ones:
- support for all versions of Windows starting from Windows 2000;
- 64-bit and 32-bit installation support;
- built-in Pascal script processor for more flexible customization;
- possibility to pack the application and all the files that are needed for its operation into one compact .exe file;
- Inno Setup supports several data compression modes. If necessary, built-in compression can be disabled and third-party archivers can be used;
- it allows adding registry keys during installation, launching additional applications during, before and after installation;
- possibility to delete registry keys and all traces of program activity, flexibly configure the uninstaller.

First meeting
You can download the stable version of Inno Setup Compiler for free from the official website. There, you can also find FAQ and documentation in English and third-party libraries that simplify the process of creating Inno Setup Script (.iss).
Inno Setup Compiler classic application has the Help section where you can find FAQ, example scripts, and documentation.
When you first start the program, you are greeted with a dialog that offers to look at examples, create your first Inno Setup Script (.iss) using the script wizard, or open an existing .iss script.

You can use the Inno Setup script wizard to create an installation file.

The wizard will offer to enter the following data:
- data on the application,
- preferred installation paths,
- files that will be included into the final distribution package,
- whether labels are needed, and if yes, then where,
- license agreement,
- documents with instructions,
- name and location of the final distribution package,
- password, if required,
- select languages that the installer should support.
When the wizard collects all the necessary information, it will offer to compile the resulting script. The file ready for installation will be in the folder that was selected for the final distribution package.
Advanced settings
If you need to customize the installer interface, work with the registry, or configure actions during the uninstallation process, then you will have to modify the installer script.
Inno Setup scripts are divided into sections, each of which is responsible for its own functionality. It also sometimes happens that different sections may be suitable for the same purpose. The order of section’s execution is strictly defined and does not depend on the section’s location in the script.
All sections of the script, except for [Setup], [Messages], [CustomMessages], [LangOptions] and [Code], contain strings divided into parameters. Each parameter has its name followed by a colon and then a value. Unless otherwise noted, parameters are optional, as they assume a default value if not specified. Several parameters in a string are separated by a semicolon and can be listed in any order.

Inno Setup script example
Comments are supported in the script, for this you need to start a string with a semicolon (“;”).
Description and examples of script sections
Define the necessary constants at the very beginning of the script, before all the sections:
#define   MyAppName      "Example"

#define   MyAppVersion   "0.0.1"

#define   MyAppPublisher "example developer"

#define   URL        "http://www.example.com"

#define   MyAppURL   "example.exe"
In this case, MyAppName is the name of the application, MyAppVersion is the version of the application, and MyAppPublisher is the developer. These constants will be available in any part of the script, and if it is required to modify something, you just need to do it once in one place.
[Setup]
This section contains global options used by the installer and uninstaller.
 AppId={{9E594ED6-EBDC-4D98-990E-F3F6B9AB9ACE}

 AppName={#MyAppName}

 AppVersion={#MyAppVersion}

 AppPublisher={#MyAppPublisher}

 AppPublisherURL={#MyAppURL}

 AppSupportURL={#MyAppURL}
Description of possible directives in the Setup section:
- AppId – a unique application identification number. It is generated automatically;
- AppName – the name of the application;
- AppVersion – the program version;
- AppPublisher – the program developer;
- AppPublisherURL – the site of the program developer;
- AppSupportURL – the support site;
- DefaultDirName – the folder where the installer will suggest installing the program by default;
- DefaultGroupName – the name of the group in the Start menu that the installer will offer by default;
- OutputBaseFilename – the name of the installation file that will be obtained after compiling the script;
- OutputDir – the folder where the executable file of the installer will be placed;
- AllowNoIcons – the “Do not create icons” checkbox will be displayed on the selection page;
- AlwaysShowDirOnReadyPage – always show the installation folder in the list of settings on the “Ready to install” page;
- CreateUninstallRegKey – if the value is “no”, the installer will not create a program item in the “Install and uninstall programs” dialog;
- Uninstallable=no – do not create an uninstaller;
- DirExistsWarning – if the value is “auto”, the installer will ask “Folder:… already exists. Do you want to proceed with the installation to this folder?”;
- LicenseFile – the license agreement;
- InfoBeforeFile – this information will be displayed in front of the “Select the installation folder” page right in the installer window. Here you can place tips for program installation and other information that will be of use to the user for the successful installation of your application;
- InfoAfterFile – this information will be displayed after the “Select the installation folder” page right in the installer window;
- UserInfoPage – if the value is “yes”, a page for entering user information will be displayed. The resulting values will be in the {userinfoname} and {userinfoorg} constants;
- DefaultUserInfoName – the default username that the installer will suggest;
- DefaultUserInfoOrg – the default name of the organization that the installer will suggest;
- UsePreviousUserInfo – use the username, organization name and serial number that the user entered during the previous installation;
- UninstallRestartComputer – restart the computer when the program is successfully uninstalled;
- PrivilegesRequired – installation is available only as an administrator;
- Compression – compression parameters. If you need to use an external archiver, the Compression value should be set to “none”;
- AlwaysRestart – after successful installation the computer will restart;
- RestartIfNeededByRun – the computer will restart only if the files launched from the [Run] section need it;
- UsePreviousAppDir – use the folder that the user selected during the previous installation;
- UsePreviousGroup – use the Start menu group that the user specified during the previous installation;
- UsePreviousSetupType – use the type and components of the previous installation;
- UsePreviousTasks – use the tasks selected by the user during the previous installation;
- WizardImageFile – an image that will be displayed on the final screen of the installer (it is in the SourceDir directory or specify the full path). The image should be in .bmp format and not larger than 164x314px. Previously this image was also displayed on the welcome screen, but according to Microsoft recommendations, it is advisable to avoid using the welcome screen;
- WizardImageStretch – if set to “yes” (not recommended), by default installation wizard images will be stretched or compressed to fit the required container. If set to “no,” wizard images will be centred in their respective areas. (This corresponds to the behaviour of Inno Setup 4.1.2 and earlier by default);
- WizardImageBackColor – assigns the background colour behind the image. Possible values:
- clRed (red);
- clYellow (yellow);
- clOlive (olive);
- clLime (lime);
- clGreen (green);
- clTeal (teal);
- clAqua (aqua);
- clBlue (blue);
- clNavy (navy);
- clPurple (purple);
- clFuchsia (fuchsia);
- clMaroon (maroon);
- clBlack (black);
- clGray (gray);
- clSilver (silver);
- clWhite (white);
- WizardSmallImageFile – a small image; during installation it will be in the upper right corner;
- WizardSmallImageBackColor – sets the background colour behind the small image. Possible values are the same as the large one has;
- WindowVisible – if set to “yes”, a gradient background window will appear behind the wizard. Please note that this directive is considered outdated and likely to be removed at some point in the future;
- BackColor – the initial colour of the gradient fill of the window displayed behind the wizard (WindowVisible);
- BackColor2 – the final colour of the gradient fill of the window displayed behind the wizard (WindowVisible);
- BackColorDirection – the direction of the gradient fill (WindowVisible);
- BackSolid – “no” (gradient fill enabled) is set by default. If set to “yes”, the background colour will be solid and the same as BackColor;
- WindowShowCaption – if set to “no”, the installer will be really “full screen” – it will not have a header bar or borders and will overlap the taskbar. This directive has no effect, if WindowVisible is not set to “yes”;
- WindowVisible – if set to “yes,” the background window of the installer will initially be displayed in a maximized state without overlapping the taskbar. This directive has no effect, if WindowVisible is not set to “yes”;
- WindowResizable – if set to “no”, the user will not be able to change the size of the installer background window, if it is not maximum. This directive has no effect, if WindowVisible is not set to “yes”;
- FlatComponentsList – if this directive is set to “yes”, the installer will use flat check boxes for the component list. Otherwise, the installer will use “3D” check boxes;
- AppCopyright – specifies the copyright message to be displayed in the lower right corner of the installer background window, when WindowVisible is set to “yes”. The value of this directive is also used as the default value for the VersionInfoCopyright directive, if not specified;
- SetupIconFile – sets the installer icon. The file shall be located in the source folder of your installation when you run the installation compiler. If the full name of the path is not specified or the path name is the “compiler:” prefix, in this case it will search for the file in the compiler directory;
- ShowComponentSizes – if this directive is set to “yes”, the installer will show the size of the component in the list of components. The installer displays the size in kilobytes or megabytes depending on the largest component;
- ShowTasksTreeLines – if this directive is set to “yes”, the installer displays “tree-like lines” between parent tasks and subtasks;
- UninstallDisplayIcon – an icon for the uninstaller in the “Install and uninstall programs” dialog box of the Control Panel;
- UninstallDisplayName – the name of the program in the “Install and uninstall programs” dialog box of the Control Panel;
- UninstallFilesDir – specifies the directory where “unins *. *” files for the uninstaller are stored. Do not change this value when updating the program, otherwise the installer will not find the uninstall logs from previous versions and, therefore, will not be able to add them;
- UninstallIconFile – an icon that will be displayed in the upper right corner of the uninstall window;
- UninstallStyle – the uninstaller style;
- DisableStartupPrompt – if set to “yes”, the installer will not display the message “This program will install… on your computer…”. This parameter has no effect, if UseSetupLdr is set to “no”.
[Types]
This section is used, if the developer wants to provide the user with some installation options. Please remember that the [Types] section itself only describes installation options for a given program and shall be combined with other sections.
Name: "full"; Description: "Full installation"

Name: "compact"; Description: "Compact installation"

Name: "custom"; Description: "Custom installation"; Flags: iscustom
Interface components
This section is optional. It defines all the components that will be displayed on the wizard’s “Select components” page to configure the installation type. It is combined with the [Types] section. If the [Components] section lists components and the [Types] section does not exist, the installation types will be created automatically by the installer and may differ from what you expect.
Name: "main"; Description: "Main Files"; Types: full compact custom; Flags: fixed

Name: "help"; Description: "Help Files"; Types: full

Name: "help\english"; Description: "English"; Types: full

Name: "help\dutch"; Description: "Dutch"; Types: full
Tasks
Optional section. It provides you with an option to mark the tasks you would like to complete during installation. These tasks are displayed as check boxes and toggle buttons on the “Select additional tasks” page. Tasks themselves do nothing. It is necessary to mark some actions in other sections with the Task code: taskName. Such actions will be performed, only if the user selected the task on the corresponding page
[Task]

Name: desktopicon;
Description: "Create a &desktop icon";
 GroupDescription: "Additional icons:";
 Components: main;
 Flags: exclusive unchecked

[Icon]Name: "{commondesktop}\{#MyAppName}";
 Filename: "{app}\{#MyAppExeName}"; Tasks: desktopicon
Tasks are described in the [Tasks] section. They will be displayed in the installer window after successful application installation before the “Installation complete” page and will look like a string, the value of which will be defined by the Description parameter. The task will be completed, if the user clicks the checkbox at the beginning of this string.
The [Icons] section describes where the shortcut should be placed, how the shortcut will be titled, how it will look (option), and for which particular file it is created. The Task’s parameter of the [Icons] section calls the task described in the [Tasks] section.
The [Tasks] section does not run any files. There is the [Run] section for files running.
[Dirs]
This optional section defines any additional directories besides the application directory, which is automatically generated.
Note that you do not need to explicitly create directories before installing files in them using the [Files] section, so this section is primarily useful for creating empty directories. The example below creates empty “data” and “bin” folders in the application folder.
Name: "{app}\data"

Name: "{app}\bin"
[Files]
This section defines any files that should be installed on the user’s system. Sometimes it is enough to specify the executable file that launches the application being installed. But often other resources are needed.
If the file to be installed is a ReadMe file, the installer may prompt you to read this file after successful installation of the application. The isreadme flag of the [Files] section is used for this purpose, but you can read the ReadMe file, only if the computer does not restart after installation.
Files in the [Files] section can also have the following attributes: “system”, “readonly” and “hidden”. The Attribs parameter is responsible for file attributes, and if it is not specified, then the file will not have any attributes at all.
Source: "CTL3DV2.DLL"; DestDir: "{sys}"; Flags: onlyifdoesntexist uninsneveruninstall
Source: "MYPROG.EXE"; DestDir: "{app}"
Source: "C:\example.exe"; DestDir: "{app}"; Attribs: system hiddenSource: "README.TXT"; DestDir: "{app}"; Flags: isreadme
Icons
The section defines the application shortcuts to be created in the Start menu and/or other places, for example, on the desktop. It should be remembered, if shortcuts are specified only in the [Icons] section, they will always be created. If the Task’s parameter is also specified for the shortcut in the [Tasks] section, then the shortcut will be created, only if the user selects the corresponding task when installing the program.
Name: "{group}\My Program"; Filename: "{app}\MYPROG.EXE"; WorkingDir: "{app}"
Name: "{group}\Uninstall My Program"; Filename: "{uninstallexe}"
[INI]
It is an optional section that defines which records will be added to the INI file. If the INI file with the specified name does not exist in the specified folder, the installer will create it. If the INI file already exists, it can add, delete or modify entries in it, as well as delete the existing INI file and create a new one with the same name, but with different content.
Filename: "MyProg.ini"; Section: "InstallSettings"; Flags: uninsdeletesection
Filename: "MyProg.ini"; Section: "InstallSettings"; Key: "InstallPath"; String: "{app}"
In this example, Filename is the name of the INI file (with an .ini extension). Section is the name of the INI file section (it will be enclosed in square brackets in the resulting INI file). Key is the INI file key. String is the Key value (string).
[UninstallDelete]
This section is optional and defines which files or folders should be deleted during uninstallation.
Type: files; Name: "{win}\log.txt"
You can use the following “mask” to avoid listing all the files of the same type that should be deleted when installing or uninstalling the program:
Type: files; Name: "{app}\*.ini"
All files with the .ini extension will be deleted in this example. “Masks” for the installer are the same as for Windows: * – prefix (suffix) of any length, ? – prefix (suffix) of one character, etc.
[Languages]
The section sets languages available in the installer.
Name: "en"; MessagesFile: "compiler:Default.isl"
Name: "nl"; MessagesFile: "compiler:Languages\Dutch.isl"
[Messages]
Installer messages can be overridden by creating this section in the script file.
ButtonNext=&Forward >
[CustomMessages]
The section is used to set message values for constants {cm:…}.
[CustomMessages]
CreateDesktopIcon=Create a &desktop icon
[Tasks]
Name: desktopicon; Description: "{cm:CreateDesktopIcon}"
[LangOptions]
The section is used to customize language settings such as fonts used by the installer and uninstaller. Typically, you do not need to create the [LangOptions] section in your script file, since by default language specific settings are retrieved from the Default.isl file included in the Inno Setup.
LanguageName=English
LanguageID=$0409
LanguageCodePage=0
DialogFontName=
DialogFontSize=8
WelcomeFontName=Verdana
WelcomeFontSize=12
TitleFontName=Arial
TitleFontSize=29
CopyrightFontName=Arial
CopyrightFontSize=8
RightToLeft=no
If the language identifier is not specified before the [LangOptions] section parameter, the installer will apply them to all the languages specified in the [Languages] section (except for the LanguageName and LanguageID parameters). If you want changes to affect only a specific language, a prefix (language identifier and point) should be specified before the parameter:
rus.TitleFontSize=29
[Registry]
This optional section determines any registry keys/values that shall be created, modified, or deleted from the user’s system during installation.
By default, registry keys and values created by the installer are not deleted during uninstallation. To delete keys or values during uninstallation, add one of the following uninsdelete flags.
Root: HKCU; Subkey: "Software\My Company"; Flags: uninsdeletekeyifempty
Root: HKCU; Subkey: "Software\My Company\My Program"; Flags: uninsdeletekey
Root: HKLM; Subkey: "Software\My Company"; Flags: uninsdeletekeyifempty
Root: HKLM; Subkey: "Software\My Company\My Program"; Flags: uninsdeletekey
Root: HKLM; Subkey: "Software\My Company\My Program\Settings"; ValueType: string; ValueName: "InstallPath"; ValueData: "{app}"
Root: HKU; Subkey: {UserSid}\Software\Microsoft\Windows\CurrentVersion\Policies\System; ValueName: DisableRegistryTools; ValueType: dword; ValueData: 1
ValueType is the type of the value. It can be as follows:
- none – default value. The installer will create an empty key without any parameters. ValueName and ValueData will be ignored;
- string – the installer will create a string parameter (REG_SZ);
- expandsz – the installer will create an expanded string. It is used, for example, to add a value to an existing one. (REG_EXPAND_SZ);
- multisz – the installer will create a multi-line parameter (REG_MULTI_SZ);
- dword – the installer will create an integer parameter (REG_DWORD);
- binary – the installer will create a binary parameter (REG_BINARY).
If the ValueType parameter is string, expandsz or multisz, it will be a string that can contain constants.
If the data type is dword, it will be decimal (“123”), hexadecimal (“$7B”) or a constant representing an integer.
If the data type is binary – the sequence of hexadecimal – decimal bytes will look as follows: “00 ff 12 34”.
If the data type is none, the parameter is ignored.
[Run]
This section is optional. In this section, you can specify any number of programs to run after the program has been successfully installed, but before the installer displays the final dialog. The [UninstallRun] section is also optional and specifies any number of programs to run as the first step of uninstallation. Both sections have the same syntax, unless otherwise noted.
The programs are executed in the order in which they appear in the script. By default, when processing the [Run] / [UninstallRun] entry, the installer / uninstaller will wait for the program to end before moving on to the next one, unless the nowait, shellexec or waituntilidle flags are used.
Filename: "{app}\INIT.EXE"; Parameters: "/x"
Filename: "{app}\README.TXT"; Description: "View the README file"; Flags: postinstall shellexec skipifsilent
Filename: "{app}\MYPROG.EXE"; Description: "Launch application"; Flags: postinstall nowait skipifsilent unchecked
[Code]
Pascal scripting (modern Delphi-like Pascal) adds many new options to customize the process of installation or uninstallation. For example:
- support for interrupting the process of start installation or uninstallation in the terms of use;
- support for adding custom wizard pages to the installer during runtime;
- support for retrieving and calling DLL or other files from the Pascal script before, during or after installation;
- support for script constants that can execute any regular constants, read-from-registry, read-from-ini and read-from-commandline constants can do even more;
- support for temporary removal of types, components and / or tasks;
- support for conditional setting of [Files], [Registry], [Run] and other entries.
Pascal scripting does almost everything that the Inno program does and can do even more.
Flags
Most sections support the Flags parameter. This parameter represents a set of additional options. Several flags separated by spaces can be used in the same string. Basically, each section has its own specific flags.
[Registry]
- uninsdeletevalue – deletes key values during uninstallation;
- deletekey – allows deleting the existing key with all its child keys, parameters and values before creating a new key;
- deletevalue – allows deleting the existing parameter of the same type and with the same name in the key before creating a new parameter;
- preservestringtype – if the type of the existing registry parameter is not string or expandsz (i.e. not REG_SZ or REG_EXPAND_SZ), it will be replaced with a string parameter with the specified value; if the type of the existing parameter is string or expandsz, only its value will be replaced, and the type will remain the same;
- uninsclearvalue – when the application is uninstalled, the parameter in the registry will be entered in an empty string (of the REG_SZ type);
- uninsdeletekey – when the application is uninstalled, it deletes the registry key with all its child keys, parameters and values;
- uninsdeletekeyifempty – when the application is uninstalled, the registry key will be deleted only if it is empty;
- uninsdeletevalue – when the application is uninstalled, the registry parameter and its value will be deleted;
- dontcreatekey – it is used in situations when, during installation, the existing parameter in the registry key shall be replaced with a new one, and if the key or parameter does not exist, neither the key nor the parameter shall be created;
- createvalueifdoesntexist – the installer will create a parameter with the specified value in the registry key, only if it does not exist. It is not applied with the deletevalue flag.
[Dirs]
- deleteafterinstall – instructs the installer to create a folder, but after a successful installation or, if the installation is interrupted, delete it, if it is empty. If the folder contains files, this flag will not delete it;
- uninsalwaysuninstall – instructs the uninstaller to always try to delete the folder (if it is empty), even if it had already existed before the application was installed;
- uninsneveruninstall – instructs the uninstaller not to delete the folder when uninstalling the program; usually when uninstalling the program, the uninstaller deletes all folders that were created by the installer during installation (if they are empty).
[Files]
- ignoreversion – install the file that might have already been installed on the user’s computer, but was created a bit later, i.e. is newer (in this case the installer will leave the existing file by default);
- promptifolder – by default, when the version of the installed file is earlier as compared to the version of the existing file, the installer will not replace the existing file. When this flag is used, the installer will ask the user, whether it is required to replace the file;
- allowunsafefiles – disables automatic compiler checking for unsafe files. It is highly recommended that you DO NOT use this flag, unless you are sure you know what you are doing;
- comparetimestamp – it is recommended to use this flag in extreme cases, because it has an inherent problem: NTFS partitions store timestamps in UTC (unlike FAT partitions). The time will shift, if you change your system time zone or in case of day-light saving time. This can create a situation when files are replaced when not needed or not replaced when needed;
- confirmoverwrite – always ask the user’s confirmation before replacing the existing file;
- onlyifdestfileexists – the file should replace the file with the same name already installed on the user’s computer, and if there is no such file in the user’s system, then it should not be installed at all. This flag is useful when you create an installer to update the program already installed by the user. But it should be remembered that the user can rename some program files, and then the update will not be installed, even if the user installed the program;
- onlyifdoesntexist – install the file, only if it does not exist;
- overwritereadonly – always overwrite the read-only file. Without this flag the installer will ask the user, if the existing read-only file should be overwritten;
- replacesameversion – if the versions of the installed file and the file being installed are the same, by default the installer will not replace the installed file. This flag is used, if it is required to replace the installed file (which is recommended);
- nocompression – if you set the nocompression flag to a file, the installer will not compress only this file.
[INI]
- uninsdeleteentry – it is used to delete a specific key in a specified section when uninstalling the program;
- uninsdeletesection – it indicates that the specified section with all its keys and their values should be deleted when the program is uninstalled;
- uninsdeletesectionifempty – it is used to delete only an empty section when uninstalling the program;
- createkeyifdoesntexist – a key with the specified name will be created, only if it did not exist before installation.
[Run]
- shellexec – it is used for files that are not executable (.exe or .com) or command (.bat or .cmd). If this flag is used, the default program for the file will start it (for example, the ReadMe.txt file will be displayed on the Notepad page). The shellexec flag does not determine, whether the program has been executed or not, so it should be combined with the nowait (the installer will not wait until the running file is executed and will immediately go to the next section parameter) or waituntilidle flags (in this case the installation process will be paused, so that the user could enter the required data);
- postinstall – it is used to allow the user to choose which files to run and which not. Using the Description parameter, you can specify a comment for each of the files submitted for execution. If it is not specified, the installer will use the standard comment;
- unchecked – by default the file marked with this flag will not be selected;
- hidewizard – during program execution the installer window will be hidden;
- unhidden – the executable program (or file) will be launched in a minimized window. You should not use this flag for a program that requires user involvement during execution (for example, the user will have to enter some data);
- runmaximized – the program (file) will run in a maximized window;
- runminimized – the program (file) will run in a minimized window;
- skipifnotsilent – instructs the installer not to run the file during standard (not accelerated) installation;
- skipifsilent – instructs the installer not to run the file during quick and very quick installation;
- skipifdoesntexist – not to display an error message, if the file to be run does not exist.
Constants
Most script entries can contain constants. These are predefined strings enclosed in curly brackets {}. The installer or uninstaller converts constants to their literal values, depending on the user choice and system configuration.
There is a list of constants used in the Inno Setup below:
- {app} – the installation folder that the user selects on the Select Destination page of the wizard;
- {win} – Windows OS directory. “C:\WINDOWS”;
- {sys} – Windows system folder. By default, in 64-bit Windows the System32 path returned by this constant is associated with the directory containing 32-bit system files, just like in 32-bit Windows. (This can be cancelled by enabling 64-bit mode.);
- {syswow64} – the actual directory that contains 32-bit system files. In 32-bit Windows 32-bit system files are located in “System32” or “System”, but not in a separate SysWOW64 directory, so this constant will refer to the same directory as {sys}. It is not recommended to use this constant, unless there is a specific need to get the name of the actual directory that contains 32-bit system files;
- {sd} – points to the root folder of the drive where Windows is installed, usually “C:”. This directory constant is equivalent to the SystemDrive environment variable;
- {pf} – the path to the Program Files directory;
- {cf} – the path to the Common Files directory;
- {tmp} – a temporary directory used by the installer or uninstaller. This is not the value of the user’s TEMP environment variable. It is a subdirectory of the user’s temporary directory that is created during installation or uninstallation at startup (named like “C: \ WINDOWS \ TEMP \ IS-xxxxx.tmp”). All files and subdirectories in this directory are deleted when installation or uninstallation is complete;
- {fonts} – the font directory. Usually it is referred to as “FONTS” in the Windows directory;
- {dao} – DAO. This is equivalent to {cf} \ Microsoft Shared \ DAO;
- {dotnet11} – the 32-bit root directory of .NET Framework version 1.1.
If an attempt is made to access this constant in the system without .NET Framework version 1.1., an exception will be thrown; - {dotnet20} – the root directory of .NET Framework version 2.0-3.5. {dotnet20} is equivalent to {dotnet2032}, unless installation is performed in 64-bit mode, in which case it is equivalent to {dotnet2064};
- {dotnet2032} – a 32-bit root directory of .NET Framework version 2.0-3.5;
- {dotnet2064} – Windows 64-bit only: a 64-bit root directory of .NET Framework version 2.0-3.5;
- {dotnet40} – .NET Framework version 4.0 and later. {dotnet40} is equivalent to {dotnet4032}, unless installation is performed in 64-bit mode, in which case it is equivalent to {dotnet4064};
- {dotnet4032} – a 32-bit version of .NET Framework version 4.0 and later;
- {dotnet4064} – Windows 64-bit only: a 64-bit version of .NET Framework version 4.0 and later;
- {group} – the path to the Start folder selected by the user on the Select Start Menu Folder page in the Settings menu. This folder is created in the All Users profile, if the user who installs the application does not have administrative privileges, in which case it is created in the user profile;
- {localappdata} – the path to the local Application Data folder;
- {userappdata} & {commonappdata} – the path to the Application Data folder;
- {usercf} – the path to the current user’s common files directory. Only Windows 7 and later versions support {usercf}; if used in previous versions of Windows, it is transferred to the same directory as {localappdata}\Programs\Common;
- {userdesktop} & {commondesktop} – the path to the desktop folder;
- {userdocs} & {commondocs} – the path to My Documents folder;
- {userfavorites} & {commonfavorites} – the path to the Favourites folder;
- {userpf} – the path to the Program Files directory of the current user. Only Windows 7 and later versions support {userpf}; if used in previous versions of Windows, it is transferred to the same directory as {localappdata}\Programs;
- {olddata} – allows supplementing the already existing value of a registry parameter, if its ValueType is string, expandsz, or multisz.
Conclusion
When all the necessary sections are filled out, the Inno Setup script is compiled, and an executable installer file is generated in the folder that was specified in the OutputDir directive in the Setup section. To compile the script, select Build -> Compile in the editor menu as shown in the screenshot below:

You can also select Run -> Run, then the script will be compiled and the installation of the application will start immediately.
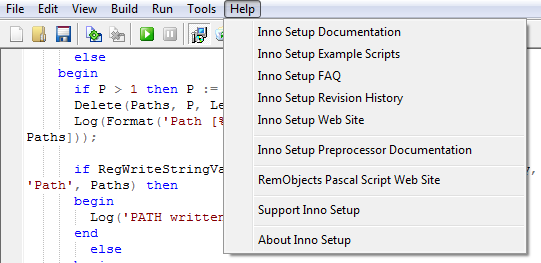
In the Help -> Inno Setup Example Scripts menu you can find several examples of how this tool allows customizing the installer to make it complete a specific task.
In general, the documentation and FAQ that are attached to the script editor are compiled in a very clear and detailed manner. There you can find solutions to most basic tasks. There are also forums where installer scripts and features of their creation are discussed. There you can find many interesting examples or ask for advice. And when you get some positive results, you can share your knowledge and maybe even brag about your success.